
This was Leo Fender’s first real swing at a mass-produced, solid-body electric guitar. After years of relentless tinkering in his Radio Shop, Leo set out to engineer an instrument specifically tuned to the needs of working musicians. At the time, these players were constantly battling feedback from hollow bodies in loud dance halls—and Leo’s solution was pure, logical genius!

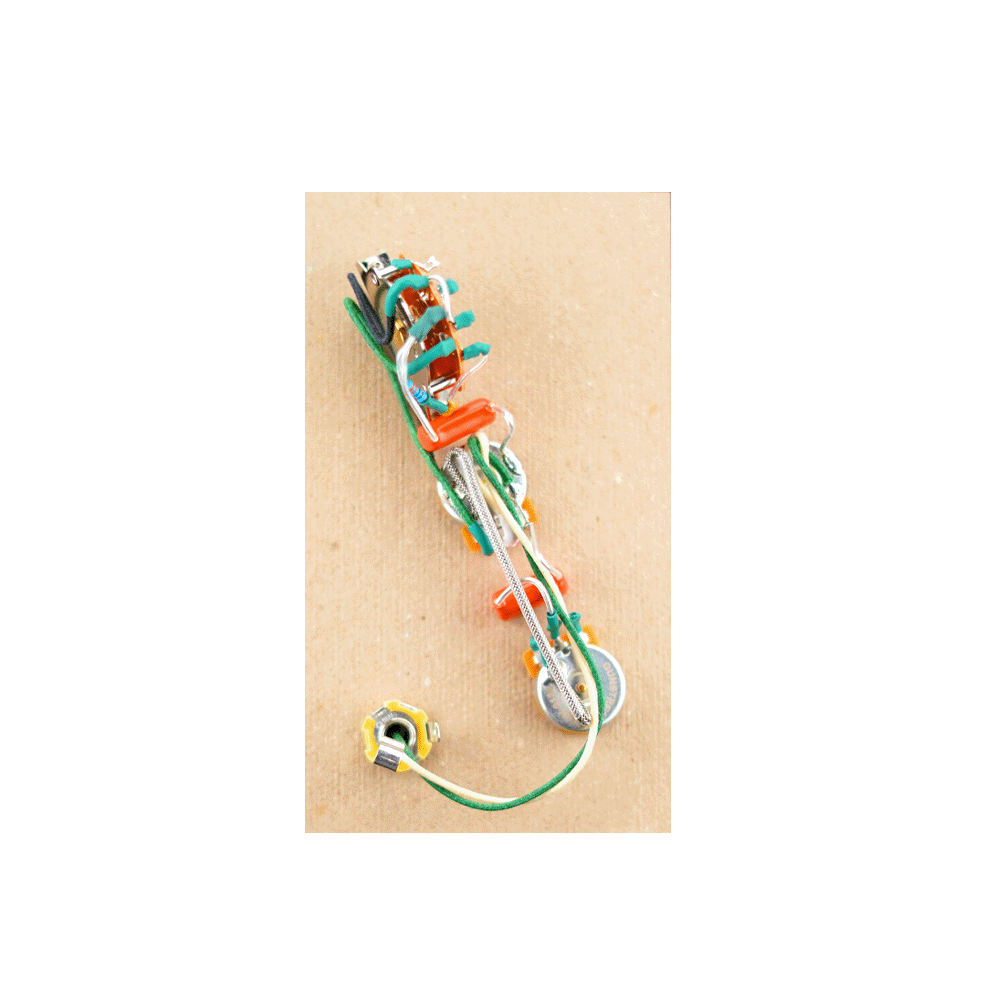
Gunstreet Hand-wired Esquire Telecaster Wiring Harness - 3 way
Designed for one pickup Telecasters
Understanding the Controls
In true Leo Fender fashion, the Esquire’s circuit is all about providing three distinct, pre-selected sounds. It’s highly likely Leo dialed these in by picking the brains of local gigging musicians and tuning the electronics to solve their real-world problems—honestly, that’s not too far off from how we handle our own design process today! lol. Here’s a quick breakdown of what you’ll find in those three switch positions:
-
-
Position 1: Volume Control Only. By bypassing the tone circuit entirely, this setting is a total favorite for players chasing that pure, unfiltered high-end bite. While many "tone purists" swear that even a disengaged tone circuit can "color" your sound—claiming it bleeds off that essential sparkle—to be honest, in the world of passive electronics, we usually think that’s just a bit of a placebo. lol. But we’ll let you be the judge—flick the switch between 1 and 2 quickly and see what your ears tell you!
-
Position 2: Tone Engaged. This is your standard setting that allows you to "tune" your sound exactly to your preference. While it was remarkably cutting-edge tech at the time, nowadays it’s often overlooked as the most basic of features—but it’s still pure, logical genius for dialing in your signature vibe!
-
Position 3: Classic Leo Fender Tone Shaping. Leo was famous for engineering circuits tuned to specific player needs (much like the Jazzmaster’s infamous rhythm circuit). This position acts as a fixed high-end cut, providing that warm, rolled-off sound that many players compare to a neck pickup. It’s a masterclass in efficiency! lol.
-
Position 1: Volume Control Only. By bypassing the tone circuit entirely, this setting is a total favorite for players chasing that pure, unfiltered high-end bite. While many "tone purists" swear that even a disengaged tone circuit can "color" your sound—claiming it bleeds off that essential sparkle—to be honest, in the world of passive electronics, we usually think that’s just a bit of a placebo. lol. But we’ll let you be the judge—flick the switch between 1 and 2 quickly and see what your ears tell you!
Part info
Raw Parts
Switch
- Brand: Gunstreet
- Cavity Depth Needed: 1-7/16” (36.51mm)
- Screw Spacing: 1-5/8” (41.28mm)
- Lever Stem aka Switch tip: .50” x .190” (1.27mm x 4.82mm)
- Screw Threading: M3
DHE "Gunstreet" Pots
- Taper style: Custom Audio
- Shaft Diameter: 3/8” (9.52MM)
- Shaft Length: 3/8th (9.52MM )
- Knob Pattern: Solid Metal Shaft 1/4th (6.35mm)
- Nut thread: 3/8 x 32
-
Pot Values per pickup option:
- Single Coil: 250k
- Humbucker: 500k
Vishay Cap
- Tolerance: -/+10%
-
Cap Values per pickup option:
- Single Coil: 0.047uf
- Humbucker: 0.022uf
Neutrik Rean mono jack
- Required mounting hole diameter: 3/8" (9.53mm)
- Thread: 3/8 x 32Thread height:1/4" (6.35mm)
Requirements (Must Read)
- To transition from an Import pot to a US Spec pot like ours, you will need to ensure your control plate features 3/8" mounting holes.
-
Please note that our potentiometers require knobs with a 1/4" diameter. Standard 6mm import knobs—commonly found on most MIM, MIJ, and other import guitars—are incompatible and will not fit.
Our Gunstreet Promise
We take our quality very seriously. That's why we only use real trained technicians who hand build each kit, and then send it through our proprietary testing process where we audio test every control, switch, or option to make sure that when you received the item its free of any hums, crackles, or pops!
Gunstreet Hand-wired Esquire Telecaster Wiring Harness - 3 way
Sale price$105.95
Regular price
Choose options
Gunstreet Hand-wired Esquire Telecaster Wiring Harness - 3 way
Sale price$105.95
Regular price