HOW TO CHOOSE A SOLDERING IRON for soldering Guitar Circuits and how to use one that isn’t very good
Written by Sean Arbow
Look, we understand not everyone is going to be able to afford the "highest rated soldering iron" on the market. We actually think you shouldn't if you don’t plan on soldering a lot. So we created this “Tips and Tricks” we divided into two parts. first, how to choose a soldering iron if you don't have one already. And Secondly, how to use a cheap one you bought at a department store that may or may not work for this.
We made an acronym for this we are calling W.H.A.T which stands for
W-Wattage
H-Heat control
A-Tip Accuracy
T-Type
W-Wattage
For me, Wattage is a make or break for soldering guitar circuits. In simple terms Wattage equals to overall temperature, so having an iron that’s too low makes soldering joints a nightmare, with higher chances of causing cold joints, or my personal favorite, mounds of solder that causes your connection to not even touch the joint needed to complete the circuit. On the latter having an Iron that is too high can cause some serious damage to components if left on the parts for extended times. I have dealt with a lot of returns that the customer fried a pot. So now that I have scared you, what is the ideal Wattage? To me a soldering Iron with a wattage between 40 to 60 is ideal. Just remember with the lower side of the spectrum that the iron can dissipate heat faster then it can create it. But you can offshoot this with our next letter “H”
H-Heat Control
Now realistically this is a feature you find only on Soldering stations but if you plan on soldering a lot we highly suggest you pick one up. Plus now a days you can pick one up as low as $40. So why do I like these? It basically takes out the guess work. Solder has a “Melting point” that once hit creates the best conditions for the solder to adhere to the joint, for example the Weller Solder we use has a melting point of +212F or 100C. so with a heat control you can actually gauge what temperature to put the iron and even be able with a high wattage iron to compensate for heat loss from melting the solder.

A-Tip accuracy
Now this is not a mandatory thing but this can make your life a lot easier. Irons come in a wide range of styles designed for individual tasks, and depending on this, there is individual tips that work better. Example being, you wouldn’t want to use a tip designed for cutting or engraving wood when soldering a PCB. You are guaranteed to solder joints you didn’t want. So which tips work the best for guitar wiring? Any tip that looks like you could use it as a pencil. you can be as accurate or inaccurate as you want with it.

T-Type
So we already touched on a style above with Soldering Stations but there is more types then you can shake a stick at.
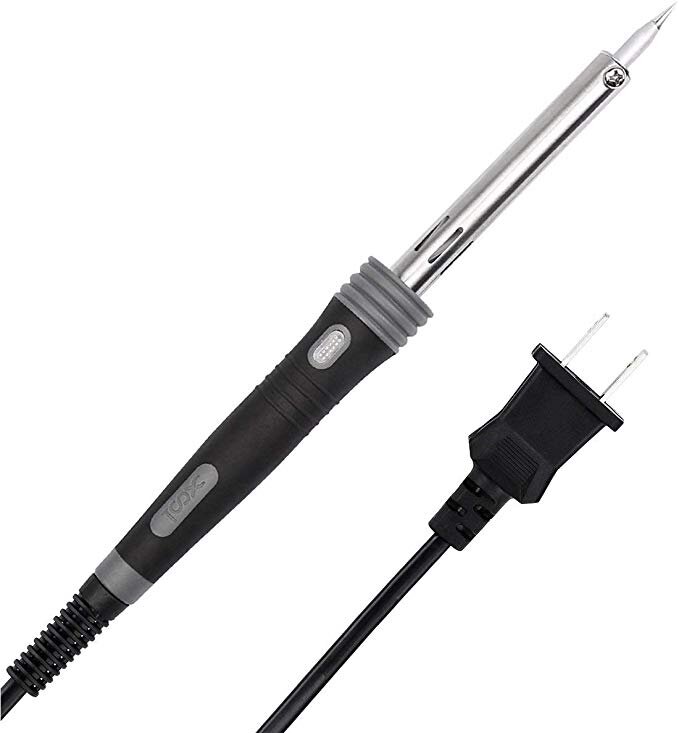
Pencil-
This is one of the most accessible types. It is the most affordable and you can find it at most Department & Hobby stores. This is a “plug and play” style. You don’t do anything besides waiting for it to heat up. On a more serious note, higher Wattage versions are the number one thing to look for when using this style. Often these things take forever to heat up and have a hard time keeping the solder melting temperature required.

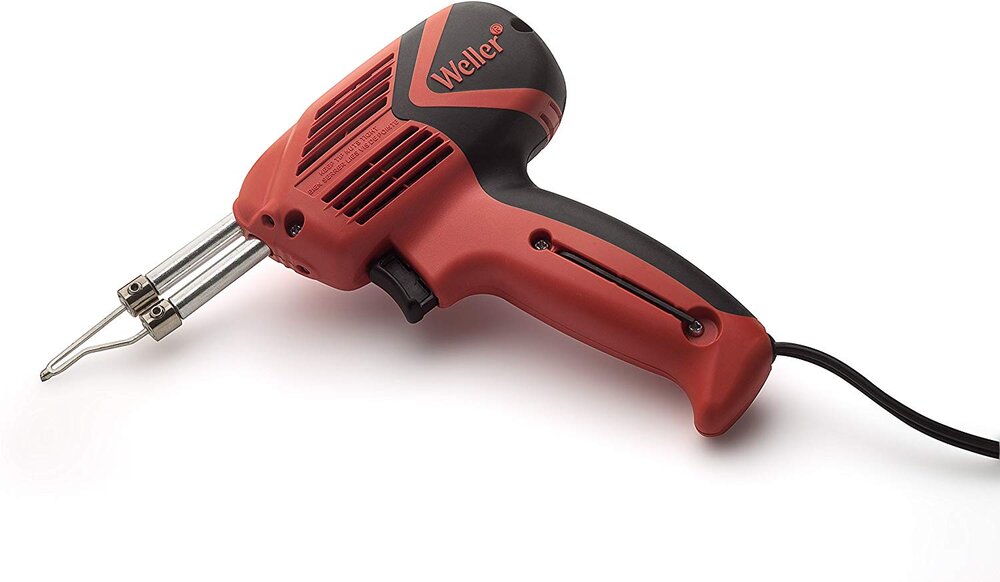
Solder Gun-
This just sounds fancy. This style is going to be the other most common as you can find it at Department stores. They work by sending current through the copper tip when you pull the trigger, hence the name. To me this style is not designed for small work. It can heat up everything around the joint too quickly. This is better used for large cables.
Side note: I am not sure how much of this is arm chair opinions or based on empirical evidence. But pickup builder say this style is bad for wiring pickups as its coils can demagnetize you pickup.
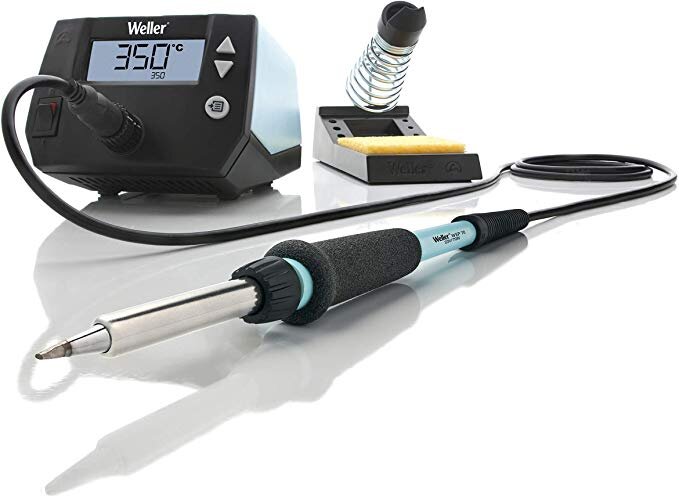
Soldering Station-
This style is the best if you plan on doing a lot of soldering and is surprisingly affordable now a days. These commonly come in 2 different styles. One being just a soldering station and the other having a hot air station combined with the iron. The hot air version is a must if you are like me and use a lot of heat shrinks when soldering.

Alright now what do you do if you have a soldering iron that isn’t the nicest?
look its alright but the name of the game is going to be Patience.
So, I am not picking on the pencil style and saying that it is bad. I am just saying its the most common, especially if you are just starting out. But, what's going to make your iron "Bad" is going to be a combo of Wattage, Age, and Style. Hey, that works as another acronym! “The reason it’s bad W.A.S my Iron!” Now some of the common issues we hear from customers is "my iron is low wattage" or, "my (old) soldering iron is the correct wattage, but it isn’t melting the solder correctly." Here’s what to do!
-Take your time between joints
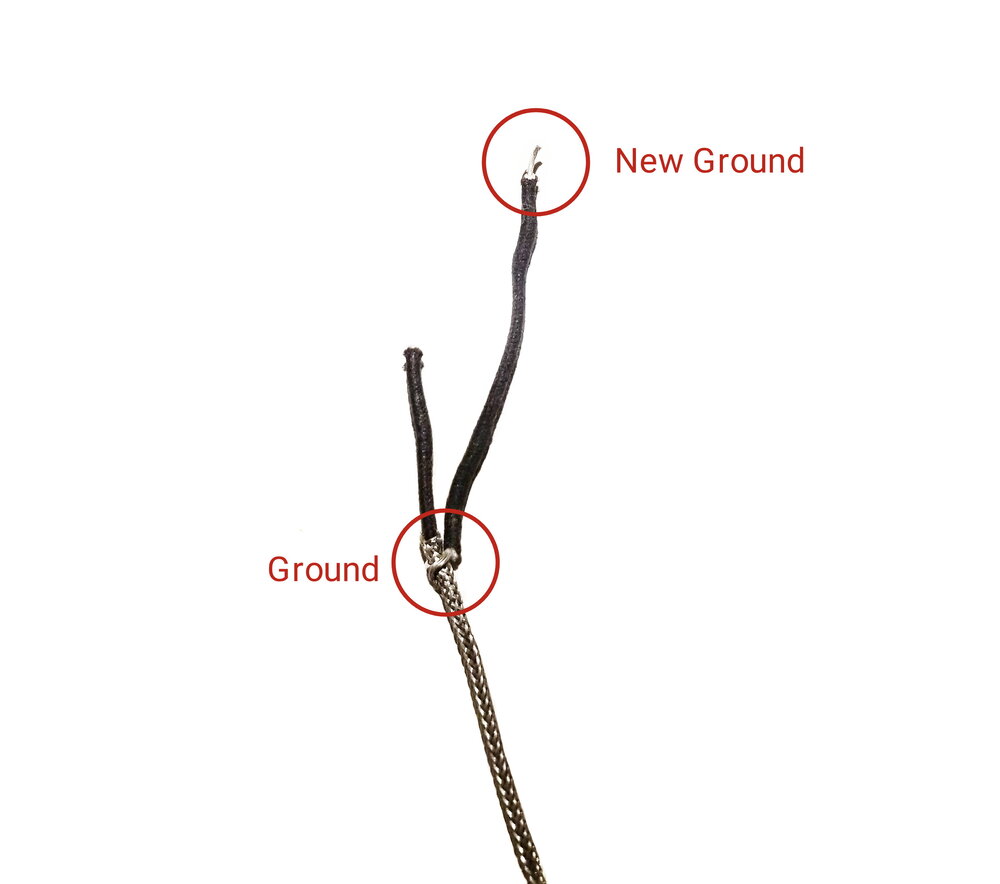
This is a must for those with low wattage irons, or old ones that can’t heat up to the correct temperature. the thing you have to remember is that each time you melt the solder you are lowering the overall temperature of the iron. So if you are doing a lot at once, you are going to have issues after the first joint. We will use this in an example. Lets say you are soldering pickups. Most times you solder the Hot first, then the ground. The first joint is perfect as the iron is hot so it melts the solder. Now, you move to the ground. In General this connection needs more heat. So if your iron is low temp, you create a cold joint, and cold joints equal the pickups having issues. A bad ground on the pickup can cause, low overall volume, Buzzing, and scratching sounds when adjusting the taper. So take your time between joints.
Lighten the load of the joint
if you are soldering solid ground wires to the pot casing, think about breaks to reheat the iron and soldering a side at a time. If you are working with braided pickup wires, try adding a separate wire to the braided part and soldering that wire to the casing. This is a great way to use less solder.